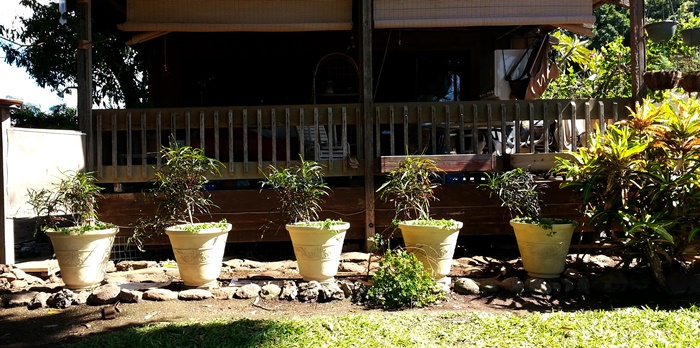
 In January, we decided to work on reestablishing the landscaping in front of our cottage lanai. When we moved in, there was a full hedge all the way along the front that provided privacy and a slight buffer from road noise. We also loved having our Cardinal bird feeder cups inside the hedge branches so we could watch them feed and enjoy their chirps and songs. The bushes have been gradually dying off one by one from North to South. They would turn brown a branch at a time and lose their leaves until eventually the whole bush was dead. We have tried several times to regrow plants in the ground but have been unable to get anything to grow (except Aloe Vera.)
 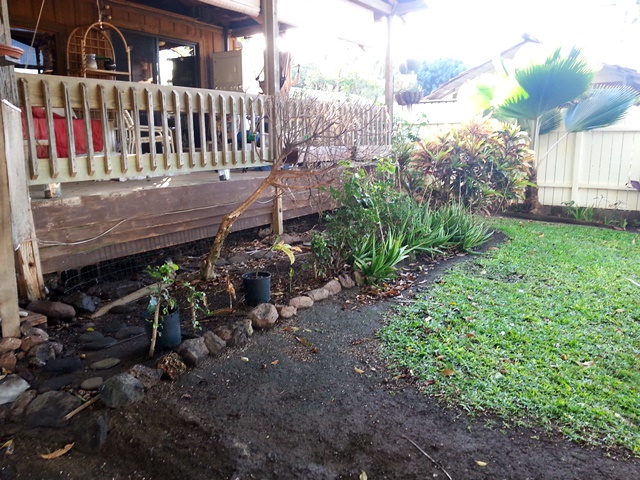 We think the ground is fairly “dead” from years of an industrial herbicide being sprayed around the bushes and now the banyan tree (a Weeping Fig) is spreading huge roots taking the available ground nutrients and starving out other plants. We love the spreading banyan tree on the property providing wonderful shade from the Kihei sun but in the process of growing huge apparently banyans crowd out any competition.
To get a nice hedge started again, we thought we’d create an above ground growth environment. That meant we wanted to consider planter pots or a planter box. You know us: we researched, calculated, shopped, and debated. We chose limestone colored pots, a good potting soil, and narrow red leaf crotons. Narrow leaf crotons had been the majority of the former hedge and they allow good cardinal viewing!
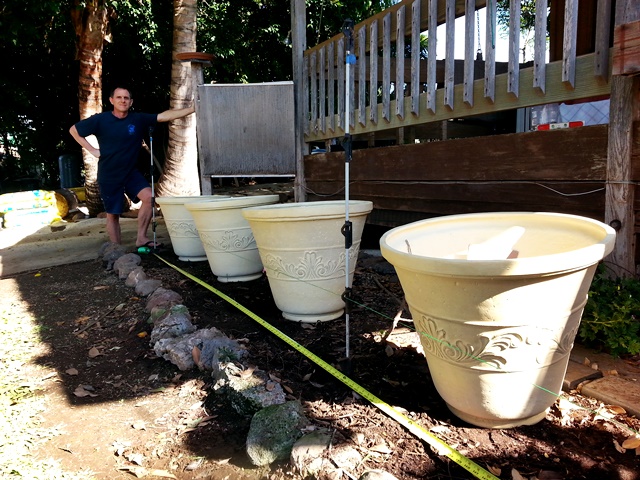 Now came the outside work: clearing and transplanting the aloe vera, pulling out the dead bushes, leveling the ground, placing the paving stones, positioning the pots, filling the dirt and planting the bushes. Part of this work, of course, included stakes, string, tape measure, and spirit level in order for the pots to be positioned evenly and level. Neil was able to link up to the existing irrigation system and extend a small drippier line to each separate pot providing water when the lawn is being watered each night. We have had a lot of onshore winds and rain squalls this year in Kihei. The plants are loving it but the croton bushes started leaning in the pots from the strong wind pressure. We carefully staked them up while they are developing their root structure in the pots.
Our hope is that the narrow leaf crotons in the pots will grow up and spread together creating a hedge-like wall that will be trimmed at the top height of the lanai (just like they were years ago). The nursery people said that crotons always have a foot or more gap above the soil before they start having branches and leaves. So just inside the rim of the pots we have planted a ground cover called “Hearts and Flowers” that will eventually drape down and hide the sides of the pots with green. 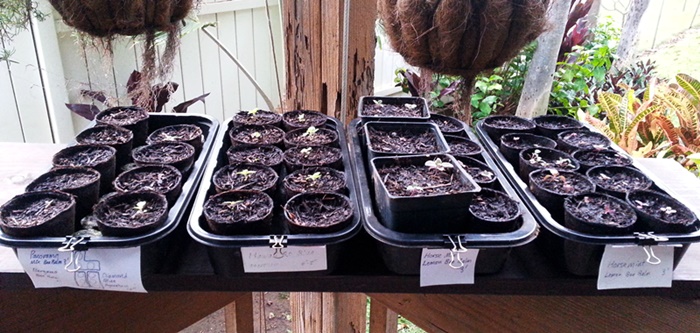 To fill the gap below the crotons with a natural mosquito deterrent we also planted starts of citronella (also known as lemon geranium, not the real citronella plant which is a grass). In addition, we hope to get some plants to grow in the ground around the pots. Neil found and ordered several types of seeds that flower but also are a natural mosquito deterrent: Bee Balm, Horse Mint, and Ageratum. Horse Mint (also known as Lemon Mint or Lemon Bee Balm) is very hardy, is salt tolerant, grows in sun or shade, deters mosquitoes yet attracts bees, butterflies, and hummingbirds. Neil planted some seeds in peat pots and has carefully nurtured them. We got some planted in the pots and the ground last week. It is interesting how some of the same seeds planted at the same time grow faster than others. We are carefully watching them including watching for slugs and caterpillars.
There is one in-ground croton still doing beautifully at the southern corner of the lanai. Although the croton bush is currently full and colorful, we fear (and anticipate) that it too will eventually be affected by the banyan tree. We prepared a sixth croton planter pot the same way we did the five in front of the lanai. We currently enjoy it below the kitchen window in our side garden. We will be able to move the sixth pot if we lose the in-ground croton and the pot will fit right into the front hedge because it was planted at the same time. Otherwise we can continue to enjoy the croton bush out the kitchen window.
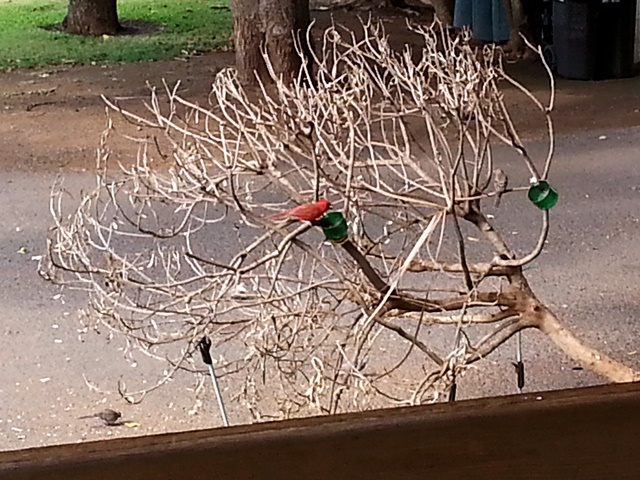 Long after it died, we left one dried dead croton standing in the front because it still holds the first two bird feeder cups we put up long ago. They are the ones the male and female cardinals prefer to use. They have us trained: when they come and sit on the branch or rail chirping, we go out and put a few striped sunflower seeds in each cup while they fly up and watch us from the tree above. Then they swoop in to eat what they want before the finches come and devour the rest. The day we cleaned out the garden and had to take it out “their” bush, the cardinals were lost. They would fly in chipping but had no place to land. Neil used stakes to prop up the dead tree out in the yard during the several days we worked and the cardinals adapted immediately to eat from cups in the new location. Once we finished planting the pots, we trimmed down the dead bush, leaving the feeling cups and some branches and tied it to the lanai rail as our “temporary” cardinal feeder until the new hedge in front grows big enough to support the feeder cups and the cardinals.
As with most projects, they always expand! We decided to continue the above ground gardening to the area behind Morley and Jean’s house. We had not been able to get anything to grow in the ground there after the hibiscus bushes started dying (again, from the industrial herbicide the landscaper insisted on using). It looked pretty barren and sad for a few years. Now the area is full of a variety of plants and ferns thanks to our friends, especially Anita, who shared many many plant starts with us! We also added hanging planters and reed fencing to camouflage the water heater and plywood shield that were an eyesore in this area before. Neil installed a drip irrigation system for this garden as well.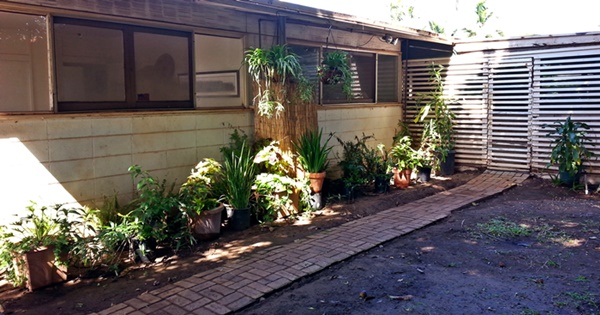
Next year we hope to share a photo with you of our young established hedge with beautiful flowering plants (and a notable absence of mosquitoes)!
[Click on any photo in the gallery below to see the full size image. Then click on the left or right arrow below it (or use your keyboard arrows) to move through all the other photos. ]


